(L)Ubuntu 14.04 Quick Un-Erase / Un-Delete Tip

An open source utility that i had installed on my Lubuntu 14.04 system, decided to blitz several of my precious folders. I can look into the ‘Trash‘ folder and see them all there, but the installed system utilities would not let me open them or copy them out. How to do that ? Well googled for a while to find there were a bunch of open source linux tools to help un-delete / un-erase deleted file partitions, and disks etc. 

Well, ok that’s useful, but what about if we just have a few precious files that ended up in Trash by mistake ? How do we get those back ? After reading this: Location of Trash onUbuntu 14.04 well that gave me the location of where ubuntu stores the trash. So had to open a terminal session to get to the command line. Then it all became rather simple.

 The first time i ran this i needed to include the ‘sudo’ prefix to make ubuntu happy enough to let me into this trash folder. Then on my system, my trash is held in my home folder so i changed directories to it here:

sudo cd ~/.local/share/Trash/files/.trash 

then i could use 

ls -al

to see all the stuff in the trash. Ok, it’s there but how do i get it back to my side ? Well simple enough, we have the move command named ‘mv’ and that was the trick. I first tried to move a file as i did NOT want to try moving a valuable directory just in case it all went wrong. So in the trash folder tried this:

~/.local/share/Trash/files/.trash mv DSL.adoc ~/Desktop

press the enter key and voila! My precious DSL.adoc file is moved back onto my ubuntu Desktop. I opened it with a text editor just to confirm it was all there – and it was !!!!

Folders Too ?

So did that for each file i wanted to restore, but what about folder directories ? Could those be retrieved ? Well, tried a non-valuable folder with the MV command and again success !!!

Then did moves for each of my precious folder to get them back to my desktop. Here is screenshot of some of this session: 

recovery sessoin on ubuntu 14.04


Have not checked permissions or ownership bits but am not fussed, as i have my valuable data back again – no big tools, utilities, etc. just knowing where the trash is on your system, the ability to change directories into that location and use of the mv command.

Note that your trash may be located at a slightly different address so you may need to hunt a little to find it. But i’ll bet your files might still be there waiting for you if you just know where !

Hope this helps you – give this post a LIKE if it does ! Happy recovery !!!


GitHub User Documentation

Github

The Github facility offers us several ways to craft documentation and ‘how to’s for our users.

Wiki

The wiki feature for each repository gives us a way to build interactive guides, instructions, install plans, etc. I don’tknow much about this yet, though will explore it in more detail later and report back to you when i figure it out.

Reference documents that explain a lot of detail can be found here for gh-pages. A nice guide to use the inbuilt web page generator can be found here.gh-pages

Approach Two

Craft a website page within the Github framework that applies to the user – something along the lines of a global page per user. Each Github user can have one of these. To do so, we add a repository to our online github accout with a particular naming convention.  For example if my user identity for Git hub was ‘fred’, then i would make a repository named fred/fred.github.com and our readers would use a browser address of fred.github.com to read up on our latest exploits !  These are known as user pages.

Approach Three

Generate a website for each of our repositories. These are known as project pages and a generator is available to produce a draft website. The generator offers a choice of styles for our websites. Once we choose a style and generate it with some preliminary content, it becomes available to our users. A browser address like http://fred.github.com/xxxx/ would offer access to the per-repository feature. ‘fred’ would be replaced by your own github user account and the ‘xxxx’ is the name of your repository.

Facebook Will Not Play Vimeo Video

Vimeo Fix For Facebook Users

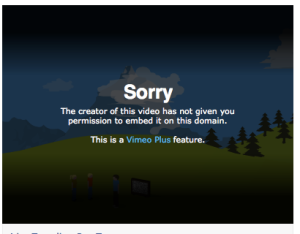
This tutorial may cure issues where a vimeo movie that YOU have created will not play in facebook. If you see this screen when you attempt to play a vimeo video, then this tip should correct that issue. If the facebook box does not look like this, then this tip may or may not solve your issues. You do NOT need to buy the Vimeo Plus feature to make this work.

Facebook will not play vimeo video

Log into your vimeo account. https://vimeo.com/ If you have more than one vimeo account, you will need to use the credentials and user name that you used when you created the video that does not work. Note that you CANNOT change the copyholder rights of videos that you did not create. You cannot change someone else’s videos.

This problem is because of copyrights and distribution rights you, as the video author, have given or withheld to each video you create. When you upload a video, you declare an undertaking that the video work is your own and that you are the owner of it, and that you have the right to do it. If you are not the owner or do not have the rights to exhibit it, then you should not upload it.

Follow these steps :

Log into your vimeo account.

Look at the menu choices at the top of your vimeo dashboard. Click the menu item Videos.

Click VIDEOS Choice
Click VIDEOS Choice

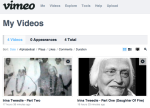
You should see My Videos as this sample shows. It will show you all the videos you’ve created with this user account.

My Videos
My Videos

Find the video that does not play in facebook. At the top right edge of that thumbnail, is a small icon of GEARS. Click that.

Click the icon that looks like a Gear

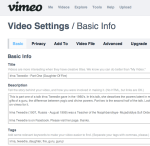
A panel appears showing you the basic info for this video, plus further menu options that you can play with and do other things with your video. You can put in a title and description of this video, tags that people can use to search for your video. You must save these changes as described below.

Video Settings / Basic Info

Find the PRIVACY choice in the menu bar. Click that.

Click PRIVACY Menu Option
Allow ANYWHERE Choice

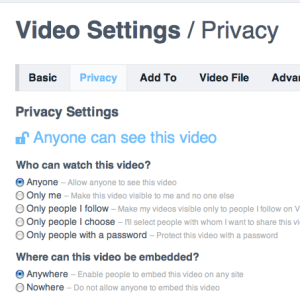
You should see the Video Settings / Privacy panel. Notice that near the middle of this panel is a choice Where can this video be embedded ? As you can see here in my example, the choice was Nowhere which restricted the playing of this video to the vimeo site only. Confirm or change this choice to Anywhere. Also confirm that the other choices allow Anyone to have access to your video.

Settings should look like this after change

Click the  Save Changes button at the bottom of the screen to update your settings for this video within vimeo.

Click SAVE CHANGES Button

Go back to your browser and log into your facebook account.

Try to play your video now. It should play normally.  If it does not, then it may be because your browser has stored a copy of the video link in it’s own cache. If you clear out the cache on your browser, you can try to play the video again. It should play normally now. If it does not, then either you have not made these changes correctly, you have the wrong address for the vimeo video, or your browser is unhappy. Try to use a different browser so determine if this is a browser issue, or an issue with the rights on your video.

HTTP Header Content Type and Encodings

Sorry about this – It was thrown together quickly more as notes to myself. Maybe you can use it ?

Needed this info. for one of my websites. Wanted to put up a feature to allow downloading of PDF’s from my google app engine service. So had to dig into the google box to find this material. First up are some references i found that helped me to understand the complexity of the task. This is necessary to create http headers in the payload going to a client like a web-browser. The http session content type is like a ‘suggestion’ to the receiving client as to what the payload has in it. That way the client can properly render or deal with the payload. If no content type is indicated, then the browser will guess as to the type of content. Another important header is the ‘Content Disposition’ which has something to do with the MIME type of the document, and even more importantly, the character encoding. See wiki reference for more MIME.

Servlet Tutorial on Session Tracking

Servlet-Tutorial-Session-Tracking

Servlet Response Headers Tutorial

http://www.apl.jhu.edu/~hall/java/Servlet-Tutorial/Servlet-Tutorial-Response-Headers.html

How to Serve A PDF From a Java Servlet

This java sample works but runs as slow as water uphill. Typically you would have a server somewhere on the internet, say amazon S3 or perhaps google, at least a service that supports the running of java jvm’s. how-do-i-serve-up-a-pdf-from-a-servlet

Tutorial on Servlet Content Types

Setting_content-type_utf-8
A must read to understand servlet content-type declarations. it’s not as easy as you think !

Unicode and Character Sets

The Absolute Minimum Every Software Developer Absolutely, Positively Must Know About Unicode and Character Sets (No Excuses!)
Joel on Software http://www.joelonsoftware.com/articles/Unicode

RFC2045 (MIME) + Base64 Content-Transfer-Encoding

rfc 2045, 1996 – the document that started it all:
http://www.ietf.org/rfc/rfc2045.txt

How to Create a Custom Jquery Plugin

http://www.ibm.com/developerworks/library/wa-jqplugin/wa-jqplugin-pdf.pdf
– courtesy IBM developerworks

Wiki MIME Content Disposition

http://en.wikipedia.org/wiki/MIME#Content-Disposition

Oracles’ Servlet Specification Javadocs

http://docs.oracle.com/javaee/1.4/api/javax/servlet/ServletResponse.html#setContentType(java.lang.String)

http://docs.oracle.com/javaee/1.3/api/javax/servlet/ServletResponse.html

Streaming Large Files In A Java Servlet

http://stackoverflow.com/questions/55709/streaming-large-files-in-a-java-servlet


import java.io.File;
import java.io.FileInputStream;
import java.io.IOException;
import java.io.OutputStream;
import javax.servlet.ServletException;
import javax.servlet.http.HttpServletRequest;
import javax.servlet.http.HttpServletResponse;
public class ReaderServlet extends javax.servlet.http.HttpServlet implements javax.servlet.Servlet {
private static final long serialVersionUID = 1L;
protected void doGet(HttpServletRequest request, HttpServletResponse response) throws ServletException, IOException {
 doIt(request, response);
 }
protected void doPost(HttpServletRequest request, HttpServletResponse response) throws ServletException,
 IOException {
 doIt(request, response);
 }
private void doIt(HttpServletRequest request, HttpServletResponse response) throws ServletException,
 IOException {
// fill in tis bit with your PDF file to be read
 String pdfFileName = "somefilename.pdf";
 String contextPath = getServletContext().getRealPath(File.separator);
 File pdfFile = new File(contextPath + pdfFileName);
response.setContentType("application/pdf");
 response.addHeader("Content-Disposition", "attachment; filename=" + pdfFileName);
 response.setContentLength((int) pdfFile.length());
FileInputStream fileInputStream = new FileInputStream(pdfFile);
 OutputStream responseOutputStream = response.getOutputStream();
 int bytes;
 while ((bytes = fileInputStream.read()) != -1) {
 responseOutputStream.write(bytes);
 }
}
}

It’s possible to have a servlet serve up PDF content by specifying the content type of the servlet response to be the ‘application/pdf‘ MIME type via response.setContentType(“application/pdf“). This tut demonstrates this as follows.

The TestServlet class is mapped to /test in your web.xml file. When the TestServlet is hit by a browser request, it locates the test.pdf file in the root of the web directory. It sets the response content type to be ‘application/pdf‘, specifying that the response is an attachment, and sets the response content length. Following that, it writes the contents of the PDF file to the response output stream.

If we hit the TestServlet, the browser may ask us if we’d like to open or save the test.pdf file. Some browsers will, others do not ask.

This technique can be useful in a variety of ways. For example, PDF content can be generated dynamically and returned to a user via the response output stream without ever needing to create an actual file in the file system. In addition, having a servlet serve up PDF content can restrict access to a PDF file in the file system  since a servlet can determine who should have access to a particular PDF file.
The original article is courtesy of Deron Eriksson: http://www.avajava.com/tutorials/lessons/how-do-i-serve-up-a-pdf-from-a-servlet.html

Servlet Javadocs

http://docs.oracle.com/javaee/1.4/api/javax/servlet/ServletResponse.html

Wiki for MIME

(Multipurpose Internet Mail Extensions) discusses these issues more fully: http://en.wikipedia.org/wiki/MIME. Here we can read up on the different MIME headers, versions, content id’s, content dispositions and transfer encodings. This is a more complex discussion of multi-part messages.

IANA manage the list of known MIME Media types, see here: http://www.iana.org/assignments/media-types/index.html
internet media types wiki: http://en.wikipedia.org/wiki/Internet_media_type

java servlet response setContentType allows several possible configurations based on the MIME type: 
response.setContentType("application/json");
response.setContentType("text/html;charset=UTF-8");
response.setContentType("text/plain");

or for typical images, something like this:
Content-Type: image/jpeg
Content-Disposition: attachment; filename=santa.jpeg;


Here is a short list

Type of Application

For Multipurpose Files

application/atom+xml: Atom feeds

application/ecmascript: ECMAScript/JavaScript; Defined in RFC 4329 (equivalent to application/javascript but with stricter processing rules)

application/EDI-X12: EDI X12 data; Defined in RFC 1767

application/EDIFACT: EDI EDIFACT data; Defined in RFC 1767

application/json: JavaScript Object Notation JSON; Defined in RFC 4627

application/javascript: ECMAScript/JavaScript; Defined in RFC 4329 (equivalent to application/ecmascript but with looser processing rules) It is not accepted in IE 8 or earlier – text/javascript is accepted but it is defined as obsolete in RFC 4329. The “type” attribute of the <script> tag in HTML5 is optional and in practice omitting the media type of JavaScript programs is the most interoperable solution since all browsers have always assumed the correct default even before HTML5.

application/octet-stream: Arbitrary binary data. Generally speaking this type identifies files that are not associated with a specific application. Contrary to past assumptions by software packages such as Apache this is not a type that should be applied to unknown files. In such a case, a server or application should not indicate a content type, as it may be incorrect, but rather, should omit the type in order to allow the recipient to guess the type.

application/ogg: Ogg, a multimedia bitstream container format; Defined in RFC 5334

application/pdf: Portable Document Format, PDF has been in use for document exchange on the Internet since 1993; Defined in RFC 3778

application/postscript: PostScript; Defined in RFC 2046

application/rdf+xml: Resource Description Framework; Defined by RFC 3870

application/rss+xml: RSS feeds

application/soap+xml: SOAP; Defined by RFC 3902

application/font-woff: Web Open Font Format; (candidate recommendation; use application/x-font-woff until standard is official)

application/xhtml+xml: XHTML; Defined by RFC 3236

application/xml-dtd: DTD files; Defined by RFC 3023

application/xop+xml:XOP

application/zip: ZIP archive files;

application/x-gzip: Gzip

Type Audio

For Audio

audio/basic: mulaw audio at 8 kHz, 1 channel; Defined in RFC 2046

audio/L24: 24bit Linear PCM audio at 8-48kHz, 1-N channels; Defined in RFC 3190

audio/mp4: MP4 audio

audio/mpeg: MP3 or other MPEG audio; Defined in RFC 3003

audio/ogg: Ogg Vorbis, Speex, Flac and other audio; Defined in RFC 5334

audio/vorbis: Vorbis encoded audio; Defined in RFC 5215

audio/x-ms-wma: Windows Media Audio; Documented in MS kb288102

audio/x-ms-wax: Windows Media Audio Redirector; Documented in MS kb288102

audio/vnd.rn-realaudio: RealAudio; Documented in RealPlayer Help

audio/vnd.wave: WAV audio; Defined in RFC 2361

audio/webm: WebM open media format

Type Image

image/gif: GIF image; Defined in RFC 2045 and RFC 2046

image/jpeg: JPEG JFIF image; Defined in RFC 2045 and RFC 2046

image/pjpeg: JPEG JFIF image; Internet Explorer; Listed in ms775147(v=vs.85) – Progressive JPEG, initiated before global browser support for progressive JPEGs (Microsoft and Firefox).

image/png: Portable Network Graphics; Defined in RFC 2083

image/svg+xml: SVG vector image; Defined in SVG Tiny 1.2 Specification Appendix M

image/tiff: Tag Image File Format (only for Baseline TIFF); Defined in RFC 3302

image/vnd.microsoft.icon: ICO image;

Type Multipart

For archives and other objects with more than one part.

multipart/mixed: MIME Email; Defined in RFC 2045 and RFC 2046

multipart/alternative: MIME Email; Defined in RFC 2045 and RFC 2046

multipart/related: MIME Email; Defined in RFC 2387 and used by MHTML (HTML mail)

multipart/form-data: MIME Webform; Defined in RFC 2388

multipart/signed: Defined in RFC 1847

multipart/encrypted: Defined in RFC 1847

Type text

For Human-Readable Text and Source Code

text/cmd: commands; subtype resident in Gecko browsers like Firefox 3.5

text/css: Cascading Style Sheets; Defined in RFC 2318

text/csv: Comma-separated values; Defined in RFC 4180

text/html: HTML; Defined in RFC 2854

text/javascript (Obsolete): JavaScript; Defined in and obsoleted by RFC 4329 in order to discourage its usage in favor of application/javascript. However, text/javascript is allowed in HTML 4 and 5 and, unlike application/javascript, has cross-browser support. The “type” attribute of the <script> tag in HTML5 is optional and there is no need to use it at all since all browsers have always assumed the correct default (even in HTML 4 where it was required by the specification).

text/plain: Textual data; Defined in RFC 2046 and RFC 3676

text/vcard: vCard (contact information); Defined in RFC 6350

text/xml: Extensible Markup Language; Defined in RFC 3023

Type Video

For video

video/mpeg: MPEG-1 video with multiplexed audio; Defined in RFC 2045 and RFC 2046

video/mp4: MP4 video; Defined in RFC 4337

video/ogg: Ogg Theora or other video (with audio); Defined in RFC 5334

video/quicktime: QuickTime video;

video/webm: WebM Matroska-based open media format

video/x-matroska: Matroska open media format

video/x-ms-wmv: Windows Media Video; Documented in Microsoft KB 288102

video/x-flv: Flash video (FLV files)

XML Use On The Internet

XML is described in more details in this Wiki: http://en.wikipedia.org/wiki/XML#Use_on_the_Internet
The design goals of XML emphasize simplicity, generality, portability and usability over the Internet.

It is a textual data format with Unicode support for several world languages. It is widely used for the representation of data structures and as a data transport layer between applications written in many programming languages.

XML Dialects include RSS, Atom, SOAP, and XHTML plus several office products such as Microsoft office, OpenOffice and LibreOffice, plus one variant as a comms protocol called XMPP for chat sessions.

Content-Disposition

The original MIME specifications only described the structure of mail messages. They did not address the issue of presentation styles. The content-disposition header field was added in RFC 2183 to specify the presentation style. A MIME part can have:

  • an inline content-disposition, which means that it should be automatically displayed when the message is displayed, or
  • an attachment content-disposition, in which case it is not displayed automatically and requires some form of action from the user to open it.

Content-Transfer-Encoding

In June 1992, MIME (RFC 1341, since made obsolete by RFC 2045) defined a set of methods for representing binary data in ASCII text format. The content-transfer-encoding: MIME header has  a two-sided significance:

It indicates whether or not a binary-to-text encoding scheme has been used on top of the original encoding as specified within the Content-Type header:

  • If such a binary-to-text encoding method has been used, it states which one.
  • If not, it provides a descriptive label for the format of content, with respect to the presence of 8 bit or binary content.

The RFC and the IANA’s list of transfer encodings define the values. See: http://www.iana.org/assignments/transfer-encodings/transfer-encodings.xml

In Preparation for Ubuntu 11.04

Thought i had learned my lesson last time when ubuntu 10.10 was released and i foolishly burned a CD to install on my favorite old laptop which already had a wonderfully working copy of Ubuntu 9.04. Doncha know it buggered the heck out of my pcmcia wireless connection and i have never been able to get it back to working shape again. Well i have 6 boxes here so it was only just a spare baby for tinkering around. Still miffed me a bit, so i thought i’d wait for release of 11.04 and do a fresh install.

As the sailor said to the lady on the street corner, the time has arrived for us to get down to business.

  1. Power on sacrificial laptop
  2. Take a FULL backup, and i mean every bit and byte
  3. Go here :http://www.ubuntu.com/download/ubuntu/download
  4. Decide on which flavor you like depending on the particular hardware you have. This will normally be either for an AMD chipset or for an Intel chipset. Look for a sticker on the outside or underside of the machine. If all else fails, read the manual. I do this once in a great while, cos i think i know it all and am too busy to be bothered at which point the blue smoke rolling out of the back of the box gives me pause for thought, that perhaps moi has made la boo-boo (again).
  5. The last time i burned a CD, i forgot to verify that it had downloaded correctly. This can be done by running a little utility program that counts up all the little bits and bytes and printouts out what is called a check-sum, which is short for check-sum – a summary total  that you can match against what Ubuntu people say they put out there. Look here: https://help.ubuntu.com/community/UbuntuHashes for a hash code value for your chosen variety of ubuntu.
  6. On my iMac, this terminal command was used to checksum the Ubuntu 11.04 .ISO for Intel systems:
RedApple:~ jim$ md5 /Users/jim/Downloads/ubuntu-11.04-desktop-i386.iso 
MD5 (/Users/jim/Downloads/ubuntu-11.04-desktop-i386.iso) = 8b1085bed498b82ef1485ef19074c281

There is a nice explanation on how to do this on different machines: https://help.ubuntu.com/community/HowToMD5SUM

Ok, so we can assume you’ve done your checksum and can confirm the value of your .ISO file matches the published value ( see above ). Now you’ll need a few tips on how to create a new CD from the .ISO file you just downloaded.

To make a new CD from your Ubuntu download, you don’t really need to waste a DVD as they hold about 4.7 GB of data and the typical Ubuntu download is about 682MB – or small enough to fit onto a single blank CD. Or bulk buy a shrink wrapped box of 10 cheap CD’s cos you’re going to throw them away when the next release comes out, or make coasters or frizzbies out of them so spare the expense and just get a cheapie. That way, if it fails to copy correctly, breaks or otherwise screws-up, you will not be heart-broken. More tips here.

Just another note : more than once, i’ve had a great download, the images seemed fine, it was for the correct Intel chipset, the MD5 check sum value was spot-on, and after burning, the CD just would not play on any of several different machines i have here. So did it all again. Fresh download. Verify download. MD5 check sum. Burn to new blank CD and – zilch. The ONLY way i had success was to burn my ubuntu.iso image at the slowest possible speed known to man or god. Then it worked and i was a happy bunny (again). So a humble suggestion : if you have a choice in the matter, do a slow burn – it may take longer but it’s still quicker than doing the whole routine three times. You have been warned.

I’ve also wanted to try making a bootable USB key, but my kit is so old, Noah used it to count the animals on the Ark, so needless to say it does not have enough smarts in the BIOS to ‘see’ a bootable USB key. You may have a later BIOS, so catch further tips here. Since I’m on a Mac i followed the instructions there to “Launch Disk Utility (Applications → Utilities → Disk Utility)”.

Ok, so i’ve done everything possible to make this a success. The iMac Disk Utility allowed me to burn the .ISO to a CD but failed with a burn error. Do not know if this is because of a faulty burner as i’ve not used it in over a year, a faulty driver, a bad CD, or what. as this is Sunday and i only have a single blank CD left, i’m asking myself,  “do you feel lucky, punk ?”, so shall i try a burn on my wife’s windows 7 kit ? Stay tuned.

On a happier note, my old sony laptop with blitzed keyboard and busted display panel has been doing service in my Cherokee tests under ubuntu 10.10. Since the wireless is still up on that, i decided to try an upgrade to 11.04 using the Start>Administration>Update Manager route just to see what goes pop. After about an hour of grinding (it’s a slow box) it decided that it needed to download about 3,000 new bits totalling 979MB of data, and took off doing do. Decided to let it run overnite and this morning it was waiting for me to make a decision as to whether to overwrite libpam-so, or something close, that is used in glassfishV3, so i said yes. I do have a few older backups, so will now hit the pause button, while i do a complete backup of that system prior to it blowing it’s brains out, or if super-lucky, a shiny new upgrade. I’m thinking the wireless will be blitzed, so that would make 2 wireless ubntu systems that are truly wireless :{

I generally tend to take the default of ‘yes’ when asked do ya wanna overwrite this current version with this newer version ? I can always do a full rebuild, but this is my only windows system left with a windows xp partition, so am reluctant to blitz the whole thing just now. It is still chunterring along quite nicely so off for a cuppa till backups are done. More anon…

Woops! “Could not install samba4 so it may not be in a working state.” Ok, so will take note of that and try to sort it out post-install. “Do you want to report this issue to the developers?” – Yes.

“The Upgrade has aborted. Your system could be in an unstable state. Resetting system using DPKG”. THEN, “The Upgrade has completed but there were errors”. Ok, so now i ask myself, is my system back to the way it was before i started the upgrade, or is it all ok, except for samba4 ? System did not restart but i still have internet. If i reboot now, will it blitz everything ? Will hang fire here till i figure out a plan of action.

LATER –  Decided to reboot the sony to see wot will work et voilà, a shiny new 11.04 awaits my pleasure. It did tell me that there was no graphics hardware to run Unity desktop, which is no miss for me as i never wanted it. So whoa! Wireless internet still works and my Cherokee service and java and groovy pieces remain in tact.  Did not even need to rebuild the disk partitions! Who’s a happy bunny now ?

BACK TO the saga of the 11.04 .iso CD  that would not burn. Did a fresh download and md5 checksum on another ubuntu 11.04 using a windows 7 system – gag 😛  but at least i can right-click mouse on my 11.04.iso to BURN TO  CD with verify – all of which went ok. Did an eject of CD and tried a boot on my apple macbook intel corpse dynamic-duo  –  naw 😛  did not like it – even tried several times. Mac can “see” the CD and browse but will not boot. 😛

Scratch head……. look for a Coors … hhhmmmm….

Forgot to read this apple advisory on using shortcut keys when booting: http://support.apple.com/kb/ht1343

ok, so ejected Cd, re-inserted Cd,then did a reboot while pressing key ‘C’ only on MacBook and voila, Houston, we have lift off. After several minutes of tinkering, the wireless internet came up. I played with the new ubuntu Unity interface for a bit but cannot say that I like it all that much. Perhaps it grows on you after a while, like mushrooms or toejam but did not have a lot of time to play. Know that on my old machines i shall be using lubuntu to void resource hogging. So that’s how i did it. Hope this helps you a bit.   😀